
Journal of the Traditional Small Craft Association
AshBreeze
The
IN THIS ISSUE
Three Additional
Boat Building
Stories
VOLUME 40, Number 1 • Spring 2019 • $4.00
Building a Dory
without any Plans

e Ash Breeze, Spring 2019
2
Ah, the spring issue! A sure sign that seasons will be changing, and we will
be back to boating soon. As I write this in January, looking out at the frozen
tundra that is Blue Hill Bay, with another nor’easter heading our way and
more forecasts of wicked negative wind chills, it takes a little imagination to
envision that bay dotted with its summer complement of classic pleasure and
rustic lobster boats.
ose of us who choose to live in these northern climes often get asked,
“How do you survive the winters?” and why. For many, the stark change
of seasons divides the year into manageable pieces, a time for being on the
water, a time for maintenance, a time for planning and dreaming, even
hobbies. Up here in Maine, there’s not much boating this time of year. Our
New Year’s Day row was canceled due to gale force winds, but we’re into
planning. We’ve opened registration for our Small Reach Regatta, planned
several other boating events, and met to discuss the next Maine Small Craft
Celebration. (Check out our MSCC ad in this issue.) As I write this in front
of the re with a swashbuckling Hornblower novel up next, there are worse
ways to pass the time.
Onto TSCA news—we had many requests for a TSCA calendar last year,
but we were late asking for photos. So, this year we’re getting our act together
early and asking now for you to send in your best photos of your boats,
a TSCA buddy’s boat, boating events, or scenic views. Depending on the
number of entries, this could turn into a fun contest. Send in your high-
resolution photos to our editor, Andy Wolfe, at [email protected].
Some of you are aware that Andy is recovering from a recent heart attack.
He’s on the mend, and we wish him the best. TSCA council members and
ocers come and go, but it’s stalwarts like Andy who keep this ship steaming
forward year after year.
Do you have too many boats? (Is that possible?) Extra boating gear
cluttering the garage? Check out the brand-new classied section on our
website: tsca.net/category/sale/. It is free to our members, another benet of
being a national TSCA member. While you’re shopping, isn’t it about time
to get a new TSCA shirt and/or hat to replace the old “boatied” ones you’ve
had for years?
I got a lot of response about the youth initiative we’ve been discussing.
Several chapters have youth boat building programs in addition to our new
Brooklin Ski Club; Cape Cod, Columbia River, and John Gardner. I’m
sure there are others. I think where the TSCA can really come into our own
is doing what council member Sue Wallace suggests, “Take a kid sailing.”
We have boats, and there are probably young neighborhood kids or relatives
around. Grab one and get them on the water. Come to think of it, it was the
Breeze
The
Ash
e Ash Breeze (ISSN 1554-5016) is
the quarterly journal of the Traditional
Small Craft Association, Inc. It is
published at Mariner Media, Inc.,
131 West 21
st
Street, Buena Vista, VA
24416.
Communications concerning
membership or mailings should be
addressed to: PO Box 350, Mystic, CT
06355. www.tsca.net
Volume 40, Number 1
Editor:
Andy Wolfe
Editors Emeriti:
Richard S. Kolin
Sam & Marty King
David & Katherine Cockey
Ralph Notaristefano
Ken Steinmetz
John Stratton
Dan Drath
Ned Asplundh
e Traditional Small Craft
Association, Inc. is a nonprot, tax-
exempt educational organization
that works to preserve and continue
the living traditions, skills, lore, and
legends surrounding working and
pleasure watercraft with origins that
predate the marine gasoline engine.
We encourage the design, construction,
and use of these boats, and we embrace
contemporary variants and adaptations
of traditional designs.
TSCA is an enjoyable yet practical
link among users, designers, builders,
restorers, historians, government, and
maritime institutions.
©2019 by e Traditional Small Craft Association, Inc.
TAB Layout Design: Karen Bowen
Cover ©Rosemary Wyman
Hugh Lane's rowing boat in front of the
Portland Yacht Services launch
President’s
Message
continued on page 21
Steve Brookman

e Ash Breeze, Spring 2019
3
roughout my career designing and building boats, I’ve
touted the virtues of round bottomed, human-powered water
craft. Anyone who studies the results of multiple open water
races between rowing craft of dierent types cannot help
noticing that the outcomes almost always favor designs with
curved hull sections. ose who have had the good fortune to
try a wide variety of rowing designs in varied conditions know
that foot for foot, well-designed round-bottomed boats are
quieter and more comfortable in rough water than boats with
at bottoms and angular hulls.
While the performance and comfort benets to be derived
from well-designed, soft-sectioned hull forms are undeniable,
there are times when the trouble and expense of making or
buying them is hard to justify. Sometimes maximum eciency
and/or comfort are just not necessary. When the main focus is
catching sh or downing ducks rather than covering miles, ne
plus ultra performance is not called for. What you will need
on those outings is a craft with sucient room for the boat’s
occupants and their equipment and enough stability for the
intended activity.
ere may also be times when you want a break from fretting
about your favorite, meticulously crafted dreamboat. Perhaps
you want to introduce youngsters to the joys of life on the
water but feel they haven’t fully developed an appreciation for
ne watercraft, nor the skills necessary to preserve them. Some
people simply lack either the money to buy a ne boat or the
time or temperament to build one. Finally, a professional boat
builder, who could use a respite from the constant pressure
to please fussy clients, might welcome the opportunity to
undertake a less demanding project. Several of those factors
came together for me when I decided to create a special gift
for my favorite shing buddy/nephew.
What I wanted was an inexpensive, quickly assembled
boat that was easy to transport to our favorite shing spots.
It had to be rugged, car-topable, capable of accommodating
two persons safely, and easily carried and launched by two
persons of average strength at undeveloped sites—not much
more than about 100 pounds. I gured a boat 14 to 15 feet
long, 3½ to 4 feet wide, with a center depth of 14 to 15 inches
should meet my stability and weight requirements without
having to resort to exotic materials and expensive building
methods. Budget, space, and time constraints limited costs to
a few hundred dollars and construction time to a few weeks.
Professional pride dictated that it should look good and row
reasonably well.
ose parameters all favor a simple at-bottomed craft built
of plywood, something like a double-ended dory. is is the
type of craft that any reasonably skilled person with ordinary
handyman tools could make pretty quickly. e primary hull
planking and the seats of my boat were gotten out of four
sheets of ¼ construction grade plywood. e rest of the
wooden structural members were made from softwood (pine,
spruce, r) scraps that I had around my house and shop. e
single form was built on a half sheet of ¾ plywood leftover
by Andre de Bardelaben
The No Plans Dory
Beauty is as Beauty Does
continued on page 8

e Ash Breeze, Spring 2019
4
How to Build a River Taf Coracle
by Walter R. Peebles
e Welsh coracle is an ancient craft, mentioned in written
records a millennium ago. It is a simple, skin-covered craft
for a single individual to travel upon rivers or streams and
maybe ponds or small lakes as they are not particularly
eective against the current or wind. Originally built of split
willow rods woven into a lattice, hazel rods, and a covering of
animal hides, they were more recently made of ash laths and a
covering of fabric impregnated with tar or pitch.
ere are a number of distinct coracle types diering in size,
shape, gunwale construction, seat support, etc. My favorite is
the one shown in the photo, which closely follows a design
from the River Taf region of Wales. If you wish to build
your own coracle, my recommendation would be to look at
illustrations of a variety of coracles and simply choose the
features you like the best. e books listed at the end of the
article will get you o to a good start.
ere are many commonalities in construction between the
various types, though there were denite regional preferences
for overall shape, number of laths and stringers, and whether
or not the bottom should include diagonal laths. Several
dierent methods were used for stabilizing the growing
structure of the basket-like frame. A few were even built on
a rudimentary form, but that may be more trouble than it is
worth if you only want to build one.
Taf coracles were typically shaped something like half of a
walnut shell. On my boat, the gunwale frame is 41" wide by
57" long. e curved front and back pieces of the gunwale
were band-sawed from natural curves of elm branches that
came down in an ice storm. e longer, shallow-curved side
pieces were cut from a similarly obtained mulberry branch.I
laid various branches on top of each other until I could see
the right shape. e "ells" at the front corner are cut out of
a natural crook of apple. ese are all about 5/8 thick and
2½ across. ey could be made even smaller but going any
heavier would be pointless.
I glued up the elm and mulberry parts of the gunwale frame
rst with epoxy, with a half-lapped joint at the bow corners,
and a shallower overlap at the stern so the stern piece sits 1/8to
1/4 proud of the side pieces. I then used a benchtop mortise
machine to cut rectangular holes about 1/4" by 1" spaced to
where I thought the rib tops should wind up. (Of course, the
old Welsh coraclemakers didn't have mortising machines, so
they drilled, or burned, holes about 3/8" diameter and tapered
the ribs and stringers to t.)
Four ribs are located in front of the seat, spaced evenly
between it and the front bar. One rib runs under the seat
where the seat support will bear on it, about 3 on center in
front of the rear edge. e nal rib is about 3 behind the rear
edge of the seat. e holes on the longer front bar should be
farther apart from the centerline than the corresponding holes
on the rear part of the frame so that the stringers get closer
together towards the stern.
e seat is a plank of cedar about 5/8" thick and 11 wide.
ere is a lot of latitude in these dimensions, depending on
how heavy a boat you are willing to carry and what materials
are available to you. ere is nothing wrong with making the
seat only seven or eight inches wide or in using thicker stock
but keep the overall weight of the coracle in mind.
ere is a divider panel beneath the seat that is about 12½"
high (a bit more if you want a deeper boat). At its ends, it
more or less follows the curve of the boat. e exact shape and
t is of little importance. is panel forms a shelf on which
the coracle sherman places his net and lunch as he carries
the boat on his back upstream to his starting place. On some
rivers, the tradition was to only use three square posts running
between the seat and a narrow plank that rested on the ribs.
Elsewhere a solid panel, or a panel made up of woven laths,
or some thin vertical panels set into two grooved planks did
the job. e latter is what I did, using the cheeks cut o the
sides of the wood I used for paddles and fanning them out a
bit towards the top because I thought it looked nicer. Once
constructed, this can be screwed to the underside of the seat
two or three inches ahead of the rear edge.
I cut the laths from fairly straight-grained white ash plank,
about 1/4" thick by 1½" wide. e basic (canonical?) coracle
design has seven transverse ribs, for which you start with stock
5.5 to 6 feet long, seven lengthwise stringers from 7 to 8 feet
long, and two diagonals about 9 feet long. e Taf coracles as
described in 1938 by James Hornell omit the diagonals and
used only ve or six ribs, so I used six.
In theory, you could calculate lengths, or measure the ribs
on an existing coracle, but the weaving and bending up to
the gunwales is all done by eye, so having them all a bit long
and then just trimming them o at the end is much simpler.
I used kiln dried ash, but air dried or green would be easier
to bend. (I've also gotten good results with kiln dried clear
poplar and clear pine.) Sand the faces and edges and soften
continued on page 16

e Ash Breeze, Spring 2019
5
Eastern Shore Sea Glass and
Coastal Arts Festival
Saturday and Sunday, April 6 and 7
Community Day & Maritime Model Expo
Sunday, May 19
Maritime Day & Blessing of the Fleet
Saturday, June 1
Antique & Classic Boat Festival
and Arts at Navy Point
Friday and Saturday, June 14 and 15
Big Band Night
Saturday, July 6, (Rain Date: Sunday, July 7)
Watermen’s Appreciation Day
Sunday, August 11
Charity Boat Auction
Saturday, August 31 (Rain or Shine)
Mid-Atlantic Small Craft Festival
Friday and Saturday, October 4 and 5
OysterFest 2019
Saturday, October 26
APR
MAY
JUN
JUL
AUG
OCT
HATCHES
EPOXY
GLASS CLOTH
HARDWARE
NAV LIGHTS
CLEATS
TOOLS
BOAT PLANS
BEACH ROLLERS
ROPE
PAINT
WWW.DUCKWORKSBBS.COM
Heritage Coast Sailing
and Rowing
Promoting Community
Boat Building, Sailing
and Rowing on the
Heritage Coast of Michigan
989-460-2642 • www.heritage-23.org
Come sail and row on beautiful Tawas Bay
e Ash Breeze, Spring 2019
6
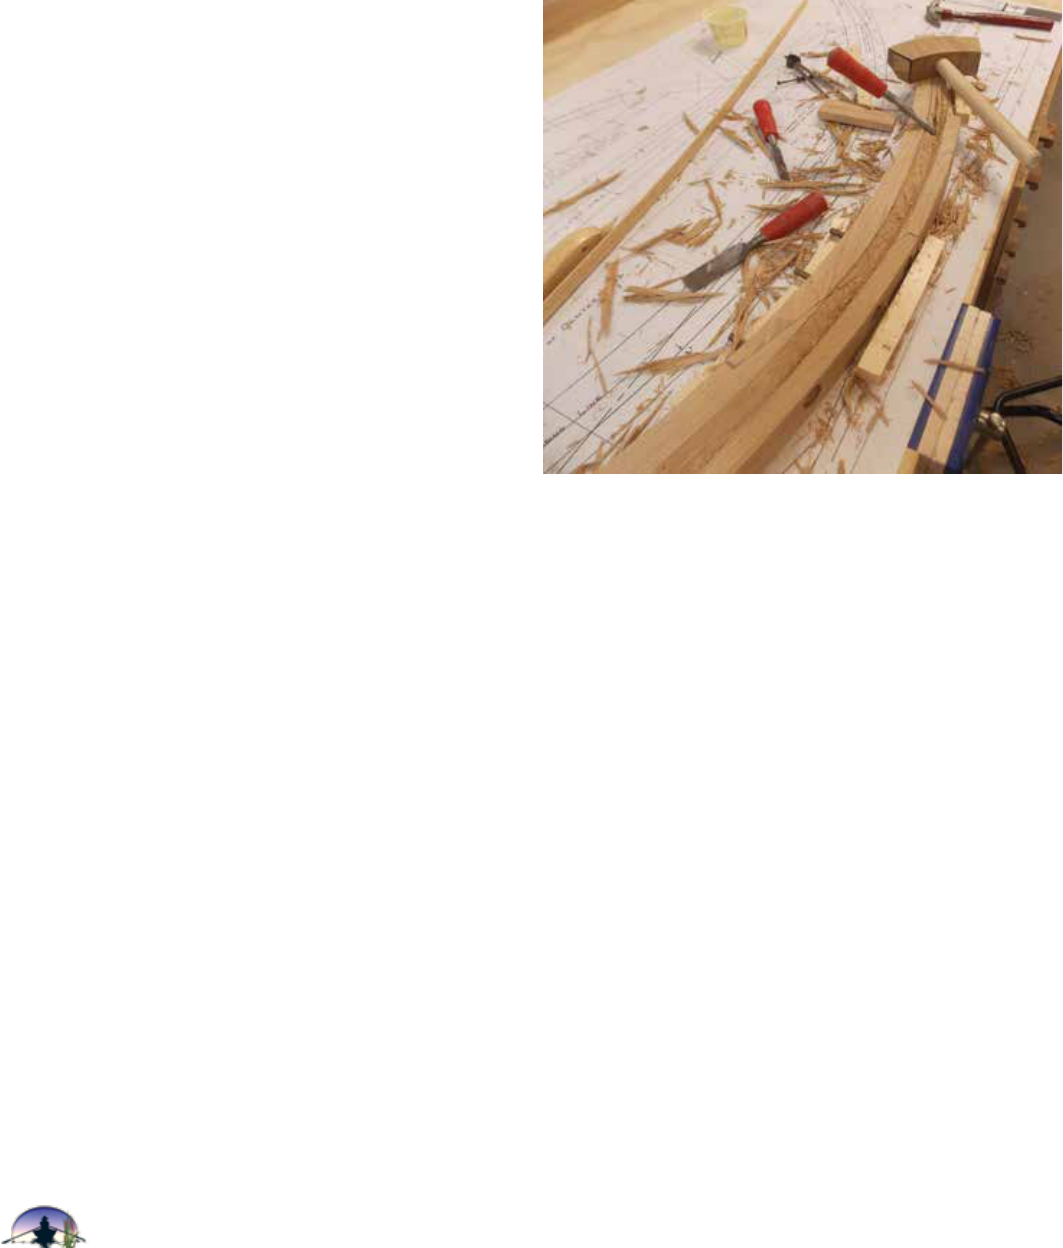
by David A. Fitch
Building the Haven 12½:
Part 2—The Process of Building
Building the Molds
e standard practice for building a Herresho boat is
to build the boat upside down through the planking phase.
en the boat is turned right side up and nished. On the
surface, this concept does not raise to the level of causing a
concern. It appears to be quite ecient, and I suppose that
it is. However, it does prove to be somewhat of a mind game
when the plans constantly refer to doing something to the top
of or to the bottom of. One has to constantly remind one’s self
that the top is the bottom until the boat is turned over. Sound
confusing? Well it is.
When laying out the molds on the paper drawings, take the
time to assure accuracy. e ultimate shape of the hull will
depend on it. As each mold is completed, go back and double
check you measurements and alignments. e black and white
pictures in the book are sometimes dicult to understand. I
often had to read the text and look at the pictures multiple
times. When using the batten, be consistent with where you
place your nails for holding the batten. Placing the nails
directly on the drawing lines will result in an oversized mold.
I found it best to hold the batten so that the outside edge of
the batten rested to the inside of the drawing line, then place
the nails appropriately to hold the batten in place.
Don’t forget to mark the shear line on your molds. is will
come in handy later on. I placed the cross brace on each mold
in such a way that the bottom edge of the brace (that will be
the top edge when you turn the boat over) was on the shear
line.
Each mold requires that you cut a bevel to the outer edge.
e angle of the bevel for each mold is listed in the materials.
e instruction book has this task done after the molds are
set. I found it easier to cut the bevel while I was building each
mold.
Building the Stem
A little side note here. In my exuberance and ignorance
when selecting stock for the stem, I came across a slab of Live
Oak. I was so excited that I would actually have Live Oak
used in the frame of my boat. Live Oak is a protected species
here in South Carolina, so it is not readily available. Boy, was
I disappointed. As I started to mill, I found numerous checks
inside the slab not visible on the surface. I also found the
wood too brittle and very hard to mill. I ended up with a stem
that I refused to use. I tried a second time from the same slab
with the same results. Yesterday, I bought a quarter sawn 8/4
White Oak board that I will use for my third attempt.
I believe I alluded in the rst article that building this boat
in some ways is also building me. As a younger man when
things did not turn out exactly to my satisfaction, I would
say to myself well that’s good enough and maybe I’ll repair
or patch it tomorrow. No more. Now when something is not
what I absolutely believe is the best I can do, I throw the piece
away, get a new piece of stock and start over.
NOTE: At picture 37 in the book, it says, “Now is a good
time to install a 5/8 diameter pine stopwater.” I had no clue
what a stopwater was and there was no denition on the book.
When you run across something like this, STOP everything
and do your research.
Building the Transom
I selected Sapele for the transom rather than Mahogany.
e appearance is similar to Mahogany, but my selection was
more extensive. I think the Sapele may be a little less forgiving
for milling. I plan to go slow and easy to mitigate tear out.
Allowing for the width of the stock I was using, I calculated
the number of pieces needed for the transom. Using the half
width drawing, I measured the width for each piece and made
my cuts, leaving each piece a bit proud. I arranged the cut
pieces on the table and then over laid the template to assure I
had adequate stock for the nish cut. I also at this time marked
where I wanted the silicon bronze dowels to be located.

e Ash Breeze, Spring 2019
7
Monthly we arrive in your mail with interesting
articles from our readers about dreaming of, designing,
building or restoring, sailing, rowing, paddling and
adventuring in small boats. Plus readers’ letters,
Bolger on Design, featured columnists, advertising
from boatbuilders, restorers, and suppliers of plans
and material for small boating, and free subscriber
classied ads.
60 Pages — 12 Issues/Year
$8 Trial Subscription (3 Issues)
$32 Subscription (12 Issues)
SEND FOR FREE SAMPLE COPY
Messing About in Boats
29 Burley St., Wenham, MA 01984
www.messingaboutinboats.com
Bob Hicks, Editor & Publisher
ducktrapstore.com
• Plans • Tools
• Hardware • Books
Everything you’ve come
to expect from
Duck Trap and more.
Suggestion: is would be a good time to use the template
to roughly mark out your nish cut lines. Doing so will
prevent you from having a cut line run through a dowel—a
lesson I learned the hard way.
I used a doweling jig to drill the holes for the silicon bronze
dowels. I also used biscuits strategically placed through the
seams to add additional strength. Pulling the pieces together
with the dowels in place required a lot of force. I used my
pipe clamps for this job. After the glue set and the cleanup,
I once again used the template to mark out the cut line for
the outside edge of the transom. At the same time, I also use
the template to mark the degree changes for the sides. I used
masking tape to mark the designated angles around the sides
to prevent damaging the surface of the Sapele. en it was
time to tackle the rolling bevel in the transom side, which
was no small task for my skill level. I was not able to use a
power saw as shown in the book. I used all hand tools: block
plane, spoke shave, chisel, and Shinto saw. It took me a day
to do each side, but I was one very proud woodworker when
I nished.
Building the Centerboard Trunk
is is a fairly straight-forward, simple process. Follow the
steps in the book. I ended up laminating the bedlog because
I could not nd stock of suitable thickness. Be sure to put
a good seal coat on the inside pieces of the trunk before
assembly. You will not have another chance. I used two coats
of unthickened epoxy.
Setting the Molds
How you set your molds will depend to some extent on what
you are using for a base. Again, I used a raised strongback. You
can use any at and level surface to which you can fasten the
continued on page 23

e Ash Breeze, Spring 2019
8
from a ooring project. As I intended to sheath the hull inside
and out in berglass and epoxy, I assembled the hull using
ordinary yellow woodworking (aliphatic) glue and commonly
available, non-marine grade metal fasteners (staples, drywall
screws). e gunwales and oarlock sockets were installed
using corrosion resistant screws. e gunwales on my boat
were made from leftover mahogany that I felt didn’t make the
quality grade for my paying customers. Many other woods
would be suitable for trimming the hull.
After making a few preliminary sketches to work out the
basic hull dimensions and seating layout, I did the actual
design work directly on the materials right on the shop oor.
While my guesswork was informed by decades of experience,
less experienced builders attempting this sort of project would
probably feel more comfortable after making scaled down
mock ups in cardboard to test their ideas rst. Aside from
the reasons given earlier, this exercise (building this boat
and writing this article) was undertaken to remove some of
the fear and mystery from boat building by demonstrating
how easily a nice, practical small boat could be made using
primarily modestly priced, locally available materials. Every
year, hundreds of potential boat builders order plans for
boats that are never completed—many are never begun. For
rst-timers, the psychological barriers to boatbuilding are
daunting enough without the added pressure of having to
acquire the pricy, exotic, hard-to-source materials that many
plans specify. Except for the berglass cloth and epoxy resin,
which were ordered from a marine supply house, all of the
materials used to make this hull could have been purchased
at a big box hardware store. e Styrofoam that we used
for supplemental otation was actually free as it was made
from discarded packing material salvaged from a dumpster
behind a tractor store. Realistically, any rst-time builder with
modest woodworking skills should get pretty good results just
by looking at a few pictures and following the basic guidelines
presented here. Remember, pretty good is what we’re aiming
for. In truth, nothing resembling perfection is possible using
these methods or materials.
If at the end of this project you nd that you desire a boat
with dierent characteristics, (deeper, more stable, shorter,
lighter, more or less maneuverable, or just prettier) this type
of construction lends itself to experimentation. On your next
eort, simply make the desired changes. If you nd that you
absolutely must have more renement than this method
and these materials can yield, at least you’ll have gained a
heightened appreciation for the skills and patience that go
into producing premium boats with more sophisticated hull
forms.
ough my nished boat ended up with curved sides, raked
stems and conventionally upswept sheer and bottom proles,
no curved lines were cut into the side planks. Its pleasant,
boaty looks are the result of bending batten reinforced scarfed
side planks with straight, parallel top and bottom edges, and
No Plans Dory
continued from page 3

e Ash Breeze, Spring 2019
9
Specializing in
Small-Craft Sails
www.dabblersails.com
dabblersails@gmail.com
Ph/fax 804-580-8723
PO Box 235, Wicomico Church, VA 22579
Stuart K. Hopkins, Sole Prop.
modestly slanted ends around a single vertical building form.
Anytime are is incorporated into the sides and rake in the
stems of a panel-sided boat, some spring will automatically
appear in the sheer and rocker (upward curving prole) will
be introduced in the bottom. I could have gone for a more
dramatic hull prole, but, for the sake of building simplicity,
I went with straight, parallel top and bottom lines on the
side panels. (In a sportsman’s boat, a low, moderate sheer is
preferable because it’s less conspicuous to wildlife.) In that
same vein, I limited are in the sides and kept the stem rake
moderate and symmetrical fore and aft. Since the port side
matches the starboard side, all “design” work was done on
one side and transferred to the other by tracing the rst panel
overlaid on the second. As the bow and stern ends of my boat’s
hull are essentially the same, I really only had to design one
quarter of the hull. e bottom “planking” began as two end-
beveled (scarfed) rectangles glued to the bottom edges of the
bent side panels that were trimmed to shape once the glue
had dried. Because of the wide, at oor and relatively short
waterline, I decided to add a skeg aft to enhance directional
stability. e base material for that appendage was a 2x4
stud shaped to match the curvature of the bottom and glued
directly to the hull. While making this boat I tried to avoid
several common boatbuilding steps like building a strongback
and setting up multiple forms. Also, by covering the entire
exterior and interior (seats too) of the hull with berglass, I
was able to totally sidestep the need for separate, permanent,
dedicated, too often in-the-way framing. What might sound
to rst timers like a complicated building process was easier to
execute than it is to describe.
Nobody should be intimidated by this project. ough my
boat was built in a shop equipped for and by a professional
boat builder, every important part of the building process
could have been accomplished by just about anyone in
most any garage with tools likely to be found there. Also
anyone wanting to build a similar craft shouldn’t be afraid
to incorporate building techniques favored by other builders/
authors. Want to use a hot-melt glue gun, zip ties or copper
wire stitching? It’s your boat. Did I use my pneumatic nailer
or stapler? Not using available tools would have been foolish.
Having labored as a tool-poor boatbuilder for many years
when I was starting out, I speak from experience when I say if
you put forth your best eort, there will be little to distinguish
a boat built in a garage from one assembled in a well-equipped
shop by a seasoned master. Any applications of advanced
equipment didn’t noticeably improve the overall quality of
my boat or cut more than a day or so of labor o of the time
it would have taken an amateur to build this boat. When I
chose to use construction grade plywood for the planking
and epoxy resin saturated berglass sheathing, any pretense
of producing a museum quality historical replica went out the
continued on page 18

e Ash Breeze, Spring 2019
10
Life Members
• Dan & Eileen Drath • Jean Gardner • Bob Hicks • Peter T. Vermilya • Sidney S. Whelan, Jr.
Benefactors
• Norm Greisen • Samuel E. Johnson • Robert E. (Bub) Sullivan • John Weiss
Generous Patrons
• Roger B. Allen • Harold C. Appleton • Donald Betts • Kim Bottles • Bill Bradley • Steve Brookman • Lee Caldwell
• Keith S. Cheveralls • Dusty & Linda Dillion • Ben Fuller • Arthur Haberland • Robert & Jill Hazard • Colin O. Hermans
• Samuel Huber • David Kavner • omas E. King • Richard S. Kolin • Christophe Matson • Scott Morgan
• Richard Peterson • Ron Render • Bill & Karen Rutherford • Clayton Seelgen • Donald "Rock" Singewald • Leslie Smith
• Lawrence Sorenson • Bill Stirling • Benjamin B. Swan • Reagan Tucker • Andy Wolfe • Joel Zackin
Sponsor Members *
• omas Avgeris • Ellen Barrett • Michael C. Bill • Lee Bjorklund • Kent & Barbara Bleakly • R. Fairlie Brinkley
• Robert C. Briscoe • Michael Burwell • Richard A. Butz • John S. Calhoun • Charles Canni • Nathan Carey • John W. Carlson
• Karl Christoers • Steve & Gladys Clancy • Donald & Faith Clendenen • David & Katherine Cockey • Lee & Linda Conrad
• Brandon Cooke • Brian Cooper • ad Danielson • Paul DeRoos • Russell Dewey • Dick Dodson • James Denovan
• William Edwards • Sam & Debbie Elufson • Paul Erickson • Tom Etherington • Cricket Evans • Frederic Fischer • David Fuller
• Richard & Susan Geiger • Gerald W. Gibbs • Roseann & David Gode • David & Emily Green • Lawrence Ha
• Jerey Hallock • Dick Hamly • Mr. & Mrs. R. Bruce Hammatt • Bryan Hammond • Kevin Hart • Tom Hawkins
• John A. Hawkinson • Paul Hayslett • Allen Head • Peter Healey • David Helgerson • Peter Hendrickson & Nancy Temkin
• Dean & Susan Herring • Martin Heyman • Kevin W. Holmes • Peter Jay • Sally Johnson • Walt Kangas • Bruce Keefauver
• Remi Khu • Andrew Kitchen • Douglas Klaucke • David Kowall • Paul LaBrie • David & Sally Lawrence • Jack Lawrence
• David Lenowitz • Kent Lewis • Robert Lister • Chelcie Liu • Owen X. Loprinze • Jonathan & Ellen Lovell • Robert Macks
• Phillip R. Manheimer • Michael Martin • Pete & Susan Mathews • Michael McClure • Bud McIntire
• George "Mack" McKinney • Jonathan McNally • William Meier • Bruce Miller • Errol Miller • Mike Moore
• Daniel Morgenstern • Grigg Mullen • Mason C. Myers • Alexis P. Nason • Phil Nuccio • Lori Jo Orr & Michael Armstrong
• John Oswald • John Palenchar • Brian Palmer • Andrew Pisarczyk • Robert Pittaway • Peter Redston • Nathan Rome
• Chauncy Rucker • Richard "Je" Saar • Ron Schermacher • Richard Schubert • Paul A. Schwartz • Howard Sharp
• Bob Shipman • Gary & Diane Shirley • Charles D. Siferd • Michael A. Smith • John E. Stambaugh
• Zach Stewart & Annie Sommerville • John R. Stilgoe • John P. Stratton, III • Daniel Streeter • Kathleen Sullivan
• John E. Symons • omas Tarlow • Robert ompson • Cary Tolman & Pat Stefani • omas N. Tomlin • Jim Tolpin
• Richard Tracant • Don Traut • Larry Wachowski • Suzan Wallace • Chris Wick • Christopher Woodward
• George & Diana Woodward • Richard C. Wolfe • Steve Wright • Ronald Wurst • David B. Wyman • Bob Zolli
* Please join these and other Sponsor Members and Advertisers (shown throughout this issue) in supporting TSCA!
John Gardner Grant
In 1999, TSCA created the John
Gardner Grant program to support
projects for which sucient funding
would otherwise be unavailable. Eligible
projects are those which research,
document, preserve, and replicate
traditional small craft, associated skills
(including their construction and
uses) and the skills of those who built
and used them. Youth involvement is
encouraged.
Proposals for projects ranging
from $200 to $2000 are invited for
consideration. Grants are awarded
competitively and reviewed annually
by the John Gardner Memorial Fund
Committee of TSCA, typically in May.
“To preserve, continue, and expand the
achievements, vision and goals of John
Gardner by enriching and disseminating
our traditional small craft heritage.”
e source of funding is the John
Gardner Memorial Endowment Fund.
Funding availability is determined
annually.
Eligible applicants include anyone
who can demonstrate serious interest
in, and knowledge of, traditional small
craft. Aliation with a museum or
academic organization is not required.
Projects must have tangible, enduring
results that are published, exhibited,
or otherwise made available to the
interested public. Projects must be
reported in e Ash Breeze.
Program details, applications, and
additional information:
tsca.net/john-gardner-fund/

e Ash Breeze, Spring 2019
11
Chesapeake Bay
Maritime Museum
selected to build
Maryland Dove
e Chesapeake Bay Maritime Museum has ocially been
selected to build a new Maryland Dove, a representation
of the late 17
th
-century trading ship that accompanied the
rst European settlers to what is now Maryland. Maryland
Dove is owned by the state of Maryland and operated and
maintained by the Historic St. Mary’s City Commission.
“HSMC and CBMM are natural partners in this
project,” said Regina Faden, Executive Director at Historic
St. Mary’s City. “It fullls both our missions and delivers a
new Dove to tell the story of (early) Maryland.”
Maryland Dove is Historic St. Mary’s City’s oating
ambassador and one of its most popular exhibits. e goal
of the new ship design is to be as close to the 1634 original
as possible, including features that were not known when
Maryland Dove was built in 1978.
Ship design work will commence in January 2019, and
construction is anticipated to begin at CBMM by mid-
year. e launch of the newMaryland Doveis targeted for
2021. All work will be done in full public view, allowing
the public to experience every stage of the project.
“We are thrilled and honored to have been selected
to build a new Maryland Dove,” said CBMM President
Kristen Greenaway. “Over the course of the next few years,
our shipwrights and apprentices will build a historically
accurate replacement to the existing ship, and we welcome
guests to be a part of the construction and education
experience.”
Maryland Dove, Historic St. Mary’s City’s
oating ambassador, sits docked outside the
shipyard of the Chesapeake Bay Maritime
Museum in St. Michaels, MD, where a new
ship will be built over the next several years.
To learn more about Maryland Dove, visit
the website: bit.ly/marylanddove. For more
information on CBMM, visit cbmm.org.

e Ash Breeze, Spring 2019
12
Learn How to Teach
Math with Boats!
Framing Square Math
Bevin's Guide to Boat Building Math
Afternoons in the Boatshop
Available in Paperback and PDF Ebook
BUY YOUR COPY TODAY FROM:
Mariner Media (paperback and ebook)
marinermedia.com/product-category/boat-math/
or
WoodenBoat Store (paperback only)
woodenboatstore.com/category/boatbuilding
Cooperation and Collaboration
by Joe Youcha
If you come to the Antique Boat Museum in Clayton, NY,
over Columbus Day Weekend (October 11–14), you’ll see
over 150 folks learning about and sharing their experiences
of Teaching With Small Boats. ey’ll be part of the sixth
national conference held by the Teaching With Small Boats
Alliance (TWSBA), which encompasses groups ranging from
Maritime Museums to backyard builders working with Scout
groups.
“TWSBA 2019” is being held in concert with the Museum
Small Craft Association (MSCA). It just makes sense. So many
TWSBA groups also are part of MSCA. And, the theme of the
conference is cooperation and collaboration. Just as there’s a lot
of overlap between TWSBA and the MSCA, there are many
TSCA members doing TWSBA work—the Lost Coast Chapter
and the Brooklin Ski club jump immediately to mind.
Since a four-person discussion at the 2008 WoodenBoat
Show, TWSBA has grown into an organization with 133
Associated Programs (92 of which have attended national
conferences). ese programs from 24 states and Canada
annually serve 106,000 adults and 100,000 youth.
Over 150 people attended the 2017 TWSBA Conference
at the Chesapeake Bay Maritime Museum in St. Michaels,
MD. ose folks got charged up and went o and held 2018
regional gatherings in the Pacic Northwest, New England,
the Bay Area, the Mid-Atlantic, and the Great Lakes. As
many people attended the regional gatherings as attended the
national gathering in St. Michaels. ey worked on regional
needs and suggested topics for the Clayton conference. at’s
how TWSBA works. It’s driven by members who participate.
TWSBA teaching is “hands-on teaching.” is is what
you’ll see at the conference.
Planned sessions include:
• A hands-on educational “marketplace”—come try out
educational projects ranging from boat building to boat
design, lofting, model tow tanks, and navigation
• On the water programming
• A series of “101” instructional sessions on organiza-
tional development, program design, fundraising,
communications, and governance (It’s not all fun and
games…)
• Pecha Kucha sessions about exciting and interesting
programs
And, as always, there will be the informal down time that’s
so important for sharing and learning.
If you use small boats to teach in your community, or you’re
interested in learning more about this type of work, come to
Clayton! www.teachingwithsmallboats.org
John Brady led a tour of the Independence Seaport Museum
Small Craft Collection for TWSBA Mid-Atlantic participants.

e Ash Breeze, Spring 2019
13
In memory of
Michael K. Davis
Executive Director
died Nov. 3, 2008
Floating The Apple, an active TSCA Chapter
since 1994. With boats we build we promote
universal access onto the public waterways, as
a 501(c)(3) corp. [email protected]
Chuck Sutherland & Marilyn Vogel
2210 Finland Rd, Green Lane, PA 18054
canusailor@yahoo.com
canusail.org
A growing collection
of high quality
videos and blogs
that bring you
inside the world
of traditional boats.
Visit the following website
for a 10% discount
on membership:
www.OffCenterHarbor.com/TSCA

e Ash Breeze, Spring 2019
14
Cape Sable and the Sparrow
(Building the C. S. Sparrow)

e Ash Breeze, Spring 2019
15
by Michael Chapman
Southwest of Miami lies the peninsula of Cape Sable, an
eighty-seven mile drive through Everglades National Park
to the end of the road at Flamingo. A short distance west of
Flamingo is where the cape joins the mainland. Cape Sable is
the southernmost point of the continental United States. e
cape is bordered by Whitewater Bay to the north, Florida Bay to
the south, and the Gulf of Mexico to the west. Once a coconut
plantation, Cape Sable has a long, rich, and interesting history.
e Cape Sable Seaside Sparrow, an endangered species of the
cape, was the agreed-upon appropriate name, C. S. Sparrow,
chosen for the next boatbuilding project at the Barnacle.
e Barnacle is a historic state park, the oldest surviving
residence in South Florida located on the shores of Biscayne
Bay in Coconut Grove. Coconut Grove was the rst settlement
in this area long before the city of Miami. Ralph Middleton
Munroe, “e Commodore,” visited Coconut Grove in the
1870s, moved there from New York in the 1880s, and built
a life, family, and home in this tropical wilderness. When the
home was completed, Munroe commented the roof structure
resembled a Barnacle, and the name stuck.
Munroe was an avid yacht designer and builder with great
interest in the New England Sharpie and its possibilities for
good service in this area of shoal waters. Munroe furthered the
Sharpie design with the Egret, a double ended twenty-eight-
foot Sharpie that also navigated oshore between Biscayne Bay
and northern Florida tending to the mail service and other
duties. is period of history is before roads or rail-service in
South Florida; boats were the only mode of transportation.
e Egret was built in New York and shipped to Key West on
a Mallory steamer. Key West was the only major port in the
area. Munroe took possession of Egret and sailed back north
to Biscayne Bay.
Munroe perfected what he called the “rounded bottom
Sharpie”—the rst built was the Presto. is was a shallow
draft, center-boarded Ketch in the forty-foot range capable of
not only shoal waters but also blue water navigation. Sisters
of the Presto were described as “Presto Types.” e design
was controversial at the time due to deep-water sailors who
disputed capabilities of the design at sea. e Commodore
proved them wrong; one of the later sisters, the Kona, logged
a total of 4,000 sea miles from New York to Cuba, the
Caribbean, and Mexico.
e Egret and several other of Munroe’s designs were crossed-
planked Sharpies and in keeping with the New England
oystering craft design features. e cross-planked Flat Iron
Ski was chosen for the project. Funding for materials was
provided by the Barnacle Society, a non-prot organization
that supports the Barnacle. Along with assistance from the
Park sta, this project was made possible. A deciding factor
in this choice of boat was a photograph taken in the 1880s of
Munroe’s early design Sharpie Kingsh. In the photo, Kingsh
is tied to a pier with a Flat Iron ski in the foreground. is
was the connection to the Barnacle.
e design of the Sparrow was taken from Rauel Parker’s
book e Sharpie Book. Parker’s design as described was based
on the eight-foot New England oystering Ski in Howard I.
Chapelle’s book American Small Sailing Craft. Parker’s design
was 14-1 LOA, the perfect size for the project. In Parker’s
book, all of the designs are for plywood construction. Our
wish was for traditional cross-plank construction, so based
on Parker’s design, I redrew the Sparrow for traditional
construction.
It was very important to base all decisions on having
connections to the area. Building materials chosen were
Florida Cypress for planking, Florida Live oak for structure,
and Southern Yellow Pine for secondary structure and
deadwood. Mirage Manufacturing Company, builders of
the Great Harbor line of Trawlers in Gainesville, Florida,
were gracious in not only donating the Cypress and Live
Oak but also delivered it. e Cypress came from Gris
Lumber Company, family owned since 1955 and also located
in Gainesville. Unfortunately, the Live Oak proved to be in
poor condition and was not used; in its place, White Oak
was purchased. e wood chosen for spars is not local but
the better choice, Douglas Fir. In the matter of the Douglas
Fir, we can claim it was salvaged from one of the wrecks o
the coast. “Wrecking” in this area is another fascinating story.
One of the volunteer’s carved the sheet-line cleat from Florida
Lignum vitae. All other hardware is bronze or brass.
e project was started in 2016. In 2017, Hurricane Irma
caused a major delay with the project in that during the
storm a thirty-foot derelict shrimp boat dragged its improper
mooring and caused severe damage to the boathouse at the
Barnacle where the Sparrow was being built. e Sparrow
had an unscheduled sea trial, as the storm surge brought a
Early stages
continued on page 24

e Ash Breeze, Spring 2019
16
Coracle
continued from page 4
the corners a bit to make them easier to weave, but don't get
carried away—it's a coracle, not a yacht. e old sources all
refer to a framework of rough laths. It's helpful to mark the
centers on each piece to help align things when weaving.
It's also a good idea to practice the weaving pattern with
a few lengths of some kind of thin exible strips, like 1/2
wide plastic shipping straps or cane for seat weaving. You will
want something that is fairly sti to mimic the behavior of the
laths. Ribbon, for example, won't really tell you much about
how the basket stiens up as it develops. is is particularly
true if you are including full length diagonals in your coracle,
as it is far easier to work them in as you go than to try to insert
them in a fully woven mesh. For this reason, I suspect, some
traditions used partial diagonals that engaged only with the
outer two rows of the main grid.
I soaked the ash for about a week in a 4" pvc DWV pipe to
try to get some moisture back into the wood to help soften
it for bending. A little bleach in the water helps to cut down
on the risk of mold. e usual way was to sink the green or
air-dried laths in the creek for a few days. If you choose to
include full diagonals, you will need to start the weaving from
where the diagonals and the center rib and stringer cross and
build outward from there. Add a pair of ribs crosswise (one
on either side of the central crossing), then a pair of stringers
front to back, then crosswise again until all laths each way
are in place. Omitting the diagonals allows you to arrange all
seven of the stringers roughly in position and interlace the
ribs one at a time—a much simpler approach. e spacing
depends a bit on the overall size of the boat but keeping the
grid to about ve to six inches on center is a good start. A
rubber mallet is a big help, as are some sand bags or other
means of holding things in place while you're whacking away.
Some traditions used forked sticks holding things down to the
ground, and some used something like a shipping pallet to tie
the ribs down.
You can space the transverse ribs that will be under and
behind the seat a bit wider, and it will look nicer to narrow the
spacing of the stringers so that they get closer together towards
the back of the boat, which can be considerably narrower
than the front. I used the assembled gunwale frame to check
the alignment of the ribs. Some larger coracles benet from
interlacing a few partial ribs that don't bend up around the
bilge to stien the bottom in front of the seat where you step
in and out.
Once the weaving is done, it's time to turn up the ends of
the ribs and stringers. I have a commercial wallpaper steamer,
so I set up a manifold of hoses and open 1½" pvc plumbing
pipes about two feet long to heat several ends at a time. Start
with the stringers at the middle of the front and back, and
then do some transverse ribs, then return to the stringers, and
so on. e ends can also be bent up one at a time by wrapping
rags around the area to be bent and pouring boiling water on
the rags to concentrate the heat where needed. When the rib
is exible enough, bend it up and tie or clamp it in place, or
cut o and taper the end to t the hole.
Try to compress the rib end lengthwise as you make the
bend to compress the inside of the curve rather than stretch
the outside, and don't worry too much if a rib cracks.It is
nearly impossible to pull out the busted one and insert a
replacement, so just use a few small clamps to try to limit
the fracture and plan on smoothing it o and reinforcing the
outside of the break with a thin (1/16") layer of ash glued
on with thickened epoxy or gorilla glue. Once the cover is
stretched over the frame, the patch won't show at all.
As you bend up the ends, be sure to make the front of the
boat deeper than the back by a couple inches. It will look a
bit nicer and probably trim a bit better in the water. Trim the
ends, and either peg or glue them. It is very important that
the bottom be pretty at, for stability. is can be achieved
by ipping the frame over and weighting the bottom while
the whole thing dries out for a few days. A few boat nails
through the rib under the seat into the bottom of the divider
will help keep things in place. Be sure to sink the heads below
the surface so they don't tear the cover.
After the frame is dry, glue on the apple ells.” If you want,
you can drill a few holes into the seat and the ells and insert
dowels to give the appearance of a frame that is pegged
together. Sand it a bit and put on whatever nish you want.
ompson's Water Seal works ne, or you can varnish it if
you wish, but that may be kind of gilding the lily.Some folks
painted the laths white to enhance the contrast with the black
fabric cover.
For a cover, I used a second-hand 84" square dacron
tablecoth (like they use in the fancier restaurants) that I
obtained for a dollar or two from my local university salvage
yard. A lot of other fabrics could work as well, such as canvas,
our sacks, or even an old bed sheet. (I've thought about
taking a nished frame to a marina to have them use their
heaviest gauge storage shrink wrap as a covering. How does a
clear coracle sound?)
Staple the cloth to the edge of the gunwale, starting in
the middle of the sides and ends and working towards the
corners.Stretch as much of the shape as you can, then set up a
few pleats in each corner, trying to keep them as symmetric as
possible side for side.Fold them over towards the back. For a
neater appearance these pleats can be sewn at on the outside
using a "Speedy-Stitcher" or similar sewing awl. If you don't
stitch them, try to stick them down with whatever you paint
the fabric with, but don't fret—a lot of old photos of coracles
show large wrinkles.
You can paint the fabric with a variety of things.Heated tar,
pitch, or a mixture was traditional. I've tried non-bered roof
and foundation coating, but it takes forever to dry and gets soft

e Ash Breeze, Spring 2019
17
Sharing the Joy of Small Boats
SmallCraftCelebration.com
September 21-22, 2019
Portland Yacht Services
100 West Commercial Street
Portland, Maine
in the sunlight, so you wind up constantly cleaning tarry spots
from your hands, clothing and vehicles. I've had somewhat
better luck with a waterborne version from Menards.
Black asphalt fence paint seems to dry more thoroughly
but doesn't penetrate the fabric as well as the solvent based
foundation stu, so I thinned it about 50% with water to
blacken the fabric through, then immediately recoated with
the straight stu. A second coat (especially on the bottom)
may be a good idea. e fence paint is still a bit problematic
on really hot days and in direct sunlight. I am thinking about
using black or dark-colored latex house paint on the next
coracle or maybe even black sunbrella fabric and waterborne
polyurethane oor nish. I'm not a totally hide-bound
traditionalist, but so far all my coracles have been black.
I left the fabric a bit long, so that it protected the frame as
I painted it, then trimmed it so that I could fold over about a
half inch and staple it down. en I attached rub rails made of
about 1/4" by 1/2" ash, with the edges and corners rounded
o pretty heavily, using stainless steel oval head screws
I put a 2" wide carrying strap on mine, in keeping with
tradition, but the whole thing only weighs 23 pounds, so unless
you plan on hiking a few miles with it, you can easily leave it o.
e paddle is ve feet long with a shaft about 1/" to
1½"diameter and a 3½" wide blade about 24 inches long. I
made mine out of a ne-grained douglas r 2x4 that I salvaged
continued on page 26

e Ash Breeze, Spring 2019
18
window. Yet, my dory is no less authentic than any found
anywhere. Do you think they wouldn’t have resorted to these
methods at Lowell’s Boat Shop had they been available in the
1880s? e addition of epoxy resin, modern plastic llers and
synthetic sheathing fabric is undeniably an improvement over
19
th
century technology.
So you might be wondering, “How does your boat row?” It
rows about as well as any dory near its size—not brilliant, but
competent—safe and reassuring. If I were to build another,
would I change anything? Yes, but not very much. Every time
I complete a design-as-you-go project like this, I wish I’d had
done a few things dierently. (In a how-to companion piece,
I corrected some of the errors that I made when building my
boat.) My boat turned out a little heavier than hoped for, but
the stability and roominess of my 15x44 dory far exceeds
that of most 18 tandem canoes. It can safely and comfortably
accommodate up to three adults. If I built another, I would
work on reducing the weight some and maybe tweak the shape
to give her somewhat more conventional aesthetics, but overall
I’m satised with this boat. Functionally, both the concept
and methods behind project Sow’s Ear (that’s what we call her)
have proven to be completely sound. As I said at the outset,
sometimes perfection isn’t necessary, nor is it appropriate.
Indeed, it’s the roughness of craft like these which allows us
to put them in the background and concentrate on the task at
hand. ough my family has access to some very sophisticated
rowboats, this one gets used the most. It’s the one that I’ll lend
to my duck hunting neighbors without hesitation. It’s the one
that I can take my semi-invalid, octogenarian mother-in-law
out shing in, and it’s become our go-to choice for navigating
our rocky local rivers. It has served us admirably on our local
ponds, marshes, large reservoirs, and even Lake Erie. Based on
my experiences rowing this boat, I wouldn’t be afraid to take it
out on the Chesapeake Bay or other coastal haunts. As if that
isn’t enough, she draws compliments everywhere we take her.
So far, our budget drift boat has delivered all that we could
reasonably ask of it. e reception this boat has received has
been so positive that it’s easy to forget about the quick and
dirty nature of this project. A design like this could well serve
as the basis for an aordable livery eet. ink about it, over
a long summer you could build six nice rowboats for less than
$5,000!
No Plans Dory
continued from page 9
e Ash Breeze, Spring 2019
19
T&L TOOLS
Phone: 860-464-9485
Cell: 860-460-2212
www.tltools.com
UNSCREW-UMS™
broken-screw extractors
Remove broken screws and
other fasteners. Hollow tool
uses the stub as a guide.
170 Old Chequessett Neck Rd., Welleet, MA 02667
508-349-2383, [email protected], oldwharf.com
Building small
rowing, row/sail,
and expedition
boats for over
20 years on
Cape Cod, MA
Beautiful
Kits
chasesmallcraft.com
207-602-9587•[email protected]
You Can Do It
Sail
Row
Motor
Ready
to Build
10–20'
Models that
"REALLY SAIL"
Model boat kits
for all ages
SeaworthySmallShips.com
(410) 586-2700
Created by a boat builder • Made in the USA

e Ash Breeze, Spring 2019
20
Bayfront Maritime Center TSCA
Richard Eisenberg
40 Holland St., Erie, PA 16507
814-456-4077
rich.eisenberg@bayfrontcenter.org
www.bayfrontcenter.org
British Columbia Chapter
Quill Goldman, 2529 North Road,
Gabriola Island, BC VOR 1X5, Canada
250-247-9646
barefootwoodenboats@shaw.ca
Brooklin Ski Club
Eric Blake
PO Box 316, Brooklin, ME 04616
Brooklyn Chapter
Jim Luton, 570 20th St.
Brooklyn, NY 11218
917-971-7544
Bualo Maritime Center
Greg & Naomi Grundtisch
256 Iroquois Ave., Lancaster, NY 14086
716-681-1315
Cape Cod Chapter
Bill Stirling, 11 Naushon Circle
Centerville, MA 02632
508-790-0098
Bob Lister, 126 Donegal Circle
Centerville, MA 02632
508-420-1718
Cleveland Amateur Boatbuilding
and Boating Society (CABBS)
Ed Neal, 4079 Porter Rd.
Westlake, OH 44145
440-871-0334
Connecticut River Oar
and Paddle Club (CROPC)
Jon Persson, P.O. Box 281
Old Lyme, CT 06371
860-434-2534
Crystal River Boat Builders (CRBB)
Bill Whalen, 4539 N Grass Island Ter.
Hernando, FL 34442
352-344-5482, [email protected]
Delaware River TSCA
Frank Stauss, 856-981-0998
delrivertsca.net
Downeast Chapter
Steve Brookman
117 Parker Point Rd.
Blue Hill, ME 04614
239-822-1318
DowneastTSCA.org
Floating e Apple
Adina Taylor, 1225 Park Ave, Ste C10
New York, NY 10128
212-564-5412
Florida Gulf Coast TSCA
Michael Jones, 4721 16th Ave N.
St. Petersburg, FL
727-560-5782
Friends of the North Carolina
Maritime Museum TSCA
Brent Creelman
315 Front Street
Beaufort, NC 28516
252-728-7317
John Gardner Chapter
Dan Nelson
U of Connecticut
Avery Point Campus
1084 Shennecossett Road
Groton, CT 06340
860-535-3623, [email protected]
Les Cheneaux Chapter
Mike Jellison
906-630-1230
Lost Coast Chapter—Northern CA
President Chris Barnes
707-506-6646
Lower Columbia River Chapter
Allen Bennett
262 State Route 409
Cathlamet, WA 98612
805-208-7335
Michigan Maritime Museum Chapter
Pete Mathews, Sec’y
PO Box 100, Gobles, MI 49055
269-628-4396
North Shore TSCA
Nathan Burgess, 28 Ronaele Road
Medford, MA 02155
Old Bay Club (Chesapeake Bay, VA)
Eddie Breeden, 3001 Wintereld Rd.
Midlothian, VA 23113
(804) 615-4413
Oregon Coots
John Kohnen, PO Box 24341
Eugene, OR 97402
541-688-2826
https://groups.io/g/oregoncoots
Patuxent Small Craft Guild
Brian Forsyth, 13464 Lore Pines Lane
Solomons, MD 20688
443-804-6439
Pine Lake Small Craft Association
Sandy Bryson, Sec’y, 333 Whitehills Dr.
East Lansing, MI 48823
517-351-5976
Puget Sound TSCA
Claire Acord, President
Marty Loken, Secretary
PO Box 216, Nordland, WA 98358
360-316-1557, [email protected]
E-mail forum: [email protected]
www.tscapuget.org
Ralph Middleton Munroe Chapter
Barnacle Historic State Park
Coconut Grove, FL 33133
John Palenchar, john@palenchar.net
7641 SW 65th Place
South Miami, FL 33143
305-666-9588 (h), 305-803-1653 (c)
Sacramento TSCA
Todd Bloch, 122 Bemis Street
San Francisco, CA 94131
415-971-2844
South Jersey TSCA
George Loos, 53 Beaver Dam Rd.
Cape May Courthouse, NJ 08210
609-861-0018
Active
TSCA
Chapters

e Ash Breeze, Spring 2019
21
St. Augustine Lighthouse Chapter
Jim Millette
2353 Commodores Club Blvd
St Augustine FL 32080
410-279-9826
Texas Boatcrafters and Messers
Mack McKinney
159 Albrecht Rd.
Center Point, TX 78010
830-370-8488
ames River Chapter
Russell Smith
6 Drawbridge West
Gales Ferry, CT 06335
860-536-1113
TSC Raleigh
Dean Herring
494 Darius Pearce Rd
Youngsville, NC 27596
919-632-5915
Warren Rivers (Rhode Island) Chapter
Rock Singewald
10 Taylor St.
Warren, RI 02885
443-980-5601
Chapters Organizing
"Twin State" NH/VT Chapter
Nate Carey,
Grantham Boatworks
P. O. Box 27
Grantham, NH 03753
603-863-2915
✔ Professional development online
and in-person
✔ Tabletop Woodworking Stations turn
your tables into a woodshop
✔ All and only hand tools
✔ Project plans with step by step
directions aligned to standards
✔ Support and advice
✔ Purchase and Rental options
Portable Woodworking for Schools and Camps: Empowering, Engaging and Easy!
Learn more at: www.maplewoodshop.com [email protected]
Pres. Message
continued from page 2
neighbor down the hill when I was growing up that taught me how to sail on his
wooden Lightning. Even though it was fresh water, it got in my blood and led me
to the Navy, a lifetime of sailing, and eventually the TSCA.
It’s not too early to start thinking about the upcoming council elections. Council
members serve a 3-year term starting on June 30th, so we have 3 vacancies to ll
this year. Last year, we had a record number of volunteers opting for the council
seats and had an actual election. I hope that the enthusiasm continues, and you’ll
put your name in the hat. e workload really is light, consisting mostly of voting
by email, and it gives you the opportunity to make your voice heard about TSCA
matters.
at’s it for this issue. Send in your photos and stories and stay warm. I hope to
be back on the water and writing about boating in what will be my last column.
Calendar of Events
Port Aransas Wooden Boat Festival
April 12–13, 2019
Port Aransas, TX
Beaufort North Carolina Maritime
Museum Annual Wooden Boat
Show
May 4, 2019
NC Maritime Museum
315 Front St.
Beaufort, NC 28516
Beaufort North Carolina Round the
Island Race
May 5, 2019
9:00 a.m.–1:00 p.m.
NC Maritime Museum
315 Front St.
Beaufort, NC 28516
Go to tsca.net/events/ to
submit events from your
chapter and in your area.

e Ash Breeze, Spring 2019
22
drathmarine
hp://drathmarine.com
1557 Cale Point Road
Friday Harbor, WA 98250
Mole got it right...

e Ash Breeze, Spring 2019
23
continued from page 7
Wooden Boat Building
and Repair
615 MOYERS LANE
EASTON, PA 18042
ROB BARKER
molds. e operative terms
here is fasten. You will need to
secure the molds to the base.
is would be a good time
to have a helping hand. e
molds are not heavy, but they
are unwieldly. In addition to
fastening the molds to the
base, they have to be square
to the centerline and level. A
person on both sides makes
this task a lot easier. e rst
mold set, usually #13, also has
to be secured in such a way
as to support the rest of the
molds.
In the next article, I will
cover steam bending the oak
frames, tting the frames to
the molds and attaching to
the oor timbers, building the
keel, and getting it all ready
for planking.

e Ash Breeze, Spring 2019
24
Sparrow
continued from page 15
260 Dyckman Avenue
South Haven, MI 49090
269.637.8078
80 0. 747.3810
michiganmaritimemuseum.org
four-foot water level inside the boathouse. e
Sparrow was lashed to the strong-back, oated,
strong-back and all into a corner in the boathouse
with no damage. Repairs to the boathouse were
completed in November 2018.
e construction of the ski was straight
forward cross-planked, starting with the strong-
back and building the ski up-side down.
Traditional construction was very important, but
a few twenty-rst century materials were used.
Grooves were cut into the edges of the bottom
planks, when screwed in-place sealant was applied
to these grooves. is created an unseen, exible,
water-tight seam. is detail is similar to splining
using sealant rather than wood. Bronze screws
and bolts were used throughout, epoxy glue was
used in structural joints, and all components were
bedded in sealant. e Pintles and Gudgeons
were custom made, and to utilize at least a piece
of the Live Oak, the tiller was shaped. Synthetic
manila and cotton cordage was used for rigging
along with a Dacron sail. e sail was built for
vertical reeng to the mast. e ski is done-up
in red bottom, white topsides, and gray inboard colors. e
inside bottom, rub-rail, and spars were oiled and on the stern
seat the Cape Sable Sparrow was carved.
e Sparrow is a beautiful little ski, with pleasing lines
and double hanging knees at each thwart, also a very pleasing
detail.
Building the Sparrow in the historic boathouse at the
Barnacle on the shores of Biscayne Bay has been a fullling
experience for all involved.
e launching of the Cape Sable and the Sparrow took
place on December 8, 2018. Shake-down sailings will follow
in preparation for the 2019 historic Washington’s Birthday
Regatta.
Recommended reading:
e Commodore’s Story: e early days on Biscayne Bay
By Ralph Middleton Munroe and Vincent Gilpin
Copyright by Vincent Gilpin, 1930
2018 reprint is available from
e Barnacle Historic State Park
3485 Main Highway
Coconut Grove, FL 33133
(305) 442-6866
After Hurricane Irma—Sparrow weathered the storm!

e Ash Breeze, Spring 2019
25
The Design Works
9101 Eton Road, Silver Spring MD 20901
301-589-9391
www.messingabout.com
www.SmallBoatsMonthly.com
Small Boats
MONTHLY
Small Boats
MONTHLY
Small Boats
MONTHLY
Post unlimited classieds for
gear, boats, kits, or tools
Search the archive and read
unlimited back issues
Be a part of the conversation in
enlightening comment sections
In the Shop
On the Water
Motor • Sail • Paddle • Oar
Reviews • Adventures • Design Proles • Technique
Visit now and read any two articles for free
Join your Small Boats kindreds for
$2.99 per month or $29.99 per year

e Ash Breeze, Spring 2019
26
Coracle
continued from page 17
from an ill-conceived 1950s addition to my house that I tore
down. Since you propel the coracle with a sculling stroke o
the bow, it's helpful to have a narrow paddle rather than a
canoe paddle.
If you don't want to bother with the at gunwale I used, you
can cut a half dozen extra laths about eight feet long, and use
them as bow and stern gunwale hoops, one pair overlapping
onto the ends of the seat to which the ribs are clamped as
they are bent up, a second pair attached outside the ribs, and
a third pair outside the fabric as rub rails.You can use boat
nails, canoe tacks or screws for this work. With this style of
gunwale, a thicker seat is nice because there is more "meat" to
which to attach the hoops, or you can use a short cleat to add
attachment surface. e seat can be mounted between these
gunwales, or below or above, at the builder's discretion.
Launching day may come with a mixture of excitement
and trepidation. If you've never been in a coracle before,
you may not be quite sure what to expect, but you probably
know enough not to hope for a lot of stability. While a kayak
may roll over on its side, a coracle rolls just as readily in any
direction, and your center of gravity in a kayak is much lower!
I encourage you to try building your own coracle. It's
a great little boat for a lazy trip down your local stream or
river or to explore a small pond, and it will give you a new
appreciation for the technological ingenuity of a thousand
years ago. Be prepared for interesting conversations with just
about everyone who sees you with your coracle.
Suggestions for further inquiry:
British Coracles and Irish Curraghs, James Hornell, e
Society for Nautical Research, London, 1938. A comprehensive
historical source, long out of print but available through inter-
library loan or at sti prices on the rare book market.
e Coracle, J. Geraint Jenkins, Gwasg Carreg Gwalch,
Llanwurst, Wales, 2006, ISBN: 1-84527-045-2. Still in print,
with some very useful drawings and measurements. Draws
heavily on Hornell.
e Coracle, Elin Meek, Gomer Press, Llandysul,
Ceredigion, Wales, 2007. ISBN: 978-1-84323-839-3. Short,
but has useful photos of several steps of the building process
of a River Tywi coracle.
Coracles of the World, Peter Badge, Gwasg Carreg Gwalch,
Llanwurst, Wales, 2009. ISBN: 978-1-84527-255-5. A world-
wide survey of coracle-like boats, including some British Isles
coracles not covered by Hornell or Jenkins.
How to Make a Coracle, Sean Hellman, Crafty Little Press,
2017. ISBN: 978-0-9931861-2-7. A thorough and well-
illustrated 22-page pamphlet on building a generic coracle.
e Coracle Society website: www.coraclesociety.org.uk/

e Ash Breeze, Spring 2019
27
TSCA MEMBERSHIP FORM – Join and Renew Online at www.tsca.net
New Membership Membership Renewal/Upgrade Change of Address
Individual/Family, USA: $25 annually Sponsor: $50 annually Sponsor with ad: $75 annually
Individual/Family, Outside USA: $35 Patron: $100 annually Corporate Sponsor with ad: see below
Enclosed is my check for $ _______________________ made payable to TSCA.
Chapter member? Yes No Which Chapter? ________________________________________________________________________________________
Name ________________________________________________________________________________________________________________________
Address ______________________________________________________________________________________________________________________
City ___________________________________ State/Prov. __________ Zip/Postal Code ______________ Country ___________________________
E-mail _______________________________________________________________________________________________________________________
Photocopy and mail to: Secretary, Traditional Small Craft Association, Inc., PO Box 350, Mystic, CT 06355. Or go online to tsca.net/join/
Note: Individual and Family Memberships qualify for one vote and one copy of each TSCA mailing.
Family Memberships qualify all members of the immediate family to participate in all other TSCA activities.
The Ash Breeze
Summer 2019 Volume 40 Number 2
Editorial Deadline: May 1, 2019
Articles:
The Ash Breeze is a member-
supported publication; members are
welcome to contribute. We strongly
encourage you to send material
electronically. Send text in an e-mail
message, or as an MS Word aachment.
Send photos as e-mail aachments, in TIFF
or JPG formats, as large and/or as high-
resolution as possible. Please give captions
naming people, places, and to whom photo
credit should be given. You may also submit
photographic prints, clean line drawings or
typewrien material by U.S. Mail. Please
contact us IN ADVANCE if you must submit
handwrien text, or material in another
word processing or image format.
E-mail to: andy@marinermedia.com.
The editors reserve the right to refuse
publication of any material deemed not to be in
the best interest of the TSCA.
Advertising Annual Rates: (four
consecutive issues of The Ash Breeze).
Eective July 1, 2018
Sponsor, with 1/8 page ad ................ $75
Corporate Sponsor: 1/4 page .......... $150
Corporate Sponsor: 1/2 page ..........$400
Corporate Sponsor: full page .........$600
Corporate Sponsor: back cover ......$600
Members’ Exchange:
Text only: 50 words or less, free to
members. $10 additional, per photo.
Caps: Our navy blue TSCA caps feature
a 6-panel design made with 100%
brushed coon, and a brass grommet
and adjustment clasp. $20
T-shirts: preshrunk coon/polyester
blend, light gray with TSCA logo and
stylistic black artwork by Barry Long on
the back. Sizes S, M, L, XL, and XXL. $20
Sea Bag: high quality 600d poly-canvas,
11 inch (diameter) and 20 inches tall.
It features a drop-boom zippered
pocket, an adjustable webbed sling
carrying strap with single carry handle,
and a roomy open main compartment
with drawstring rope and webbed clip
closure. $29.95
2018 Calendar: 8-1/2″ by 11″ (opens to
11″ by 17″) wall calendar. Now $13!
Order at www.tsca.net/shop
TSCA Wares
Time to renew?
Help us save time and postage by updating your membership before
we send you a renewal request. Cut out or photocopy the membership
form at the top of this page, complete it and return it with your renewal
payment to the Secretary, PO Box 350, Mystic, CT 06355. Or, you may
send the address portion of the back cover with your payment.
Ash Breeze Back Issues: Original/
duplicated at $4 each, plus postage.
For issues before 2011 contact
Flat Hammock Press
5 Church Street, Mystic, CT 06355
860-572-2722
For issues 2012 to current contact
Andy Wolfe
540-264-0021
andy@marinermedia.com

e Traditional
Small Craft
Association, Inc.
P.O. Box 350
Mystic CT 06355
CHANGE SERVICE REQUESTED
6821 Rte 7 S.
N. Ferrisburgh, VT 05473
802-425-3926
Like us on Facebook at
facebook.com/guideboat1
Join our “Traditional Small Craft Association” Facebook group!
TSCA Members
Check our Instock Specials
on New & Used Boats
Custom Cherry Oars
Plus Free Sneak Paddle
and Sliding Seat
with New Boat Purchase
when you enter your
Membership Number.
adirondack-guide-boat.com
Free Catalog Available
Order online
Order now for discounted
summer delivery
